
 EN
EN
Introduction
Field charging your drone with a power bank has become a game-changer for aerial photographers, inspectors, and hobbyists who need extended flight time away from traditional power sources. However, many pilots underestimate the complexity involved in this seemingly simple task. The challenge isn't just about having a power bank—it's about understanding the intricate relationship between your power bank, charging cable, and drone's charging system.
One of the most critical misconceptions is that you can simply plug any power bank directly into your drone battery. In reality, your drone's original charger serves as an essential intermediary, translating power from the power bank into the precise voltage and current your battery requires. Without this crucial component, you risk damaging your battery, reducing its lifespan, or even creating a safety hazard.
Another widespread misunderstanding involves USB charging capabilities. Many pilots assume that any USB connection will work, not realizing that modern drones require specific power delivery protocols like USB-C Power Delivery (PD) or Quick Charge (QC) to charge efficiently and safely. This guide will walk you through everything you need to know about field charging, from essential equipment to step-by-step processes and critical safety calculations.
What Equipment is Essential for Field Charging?
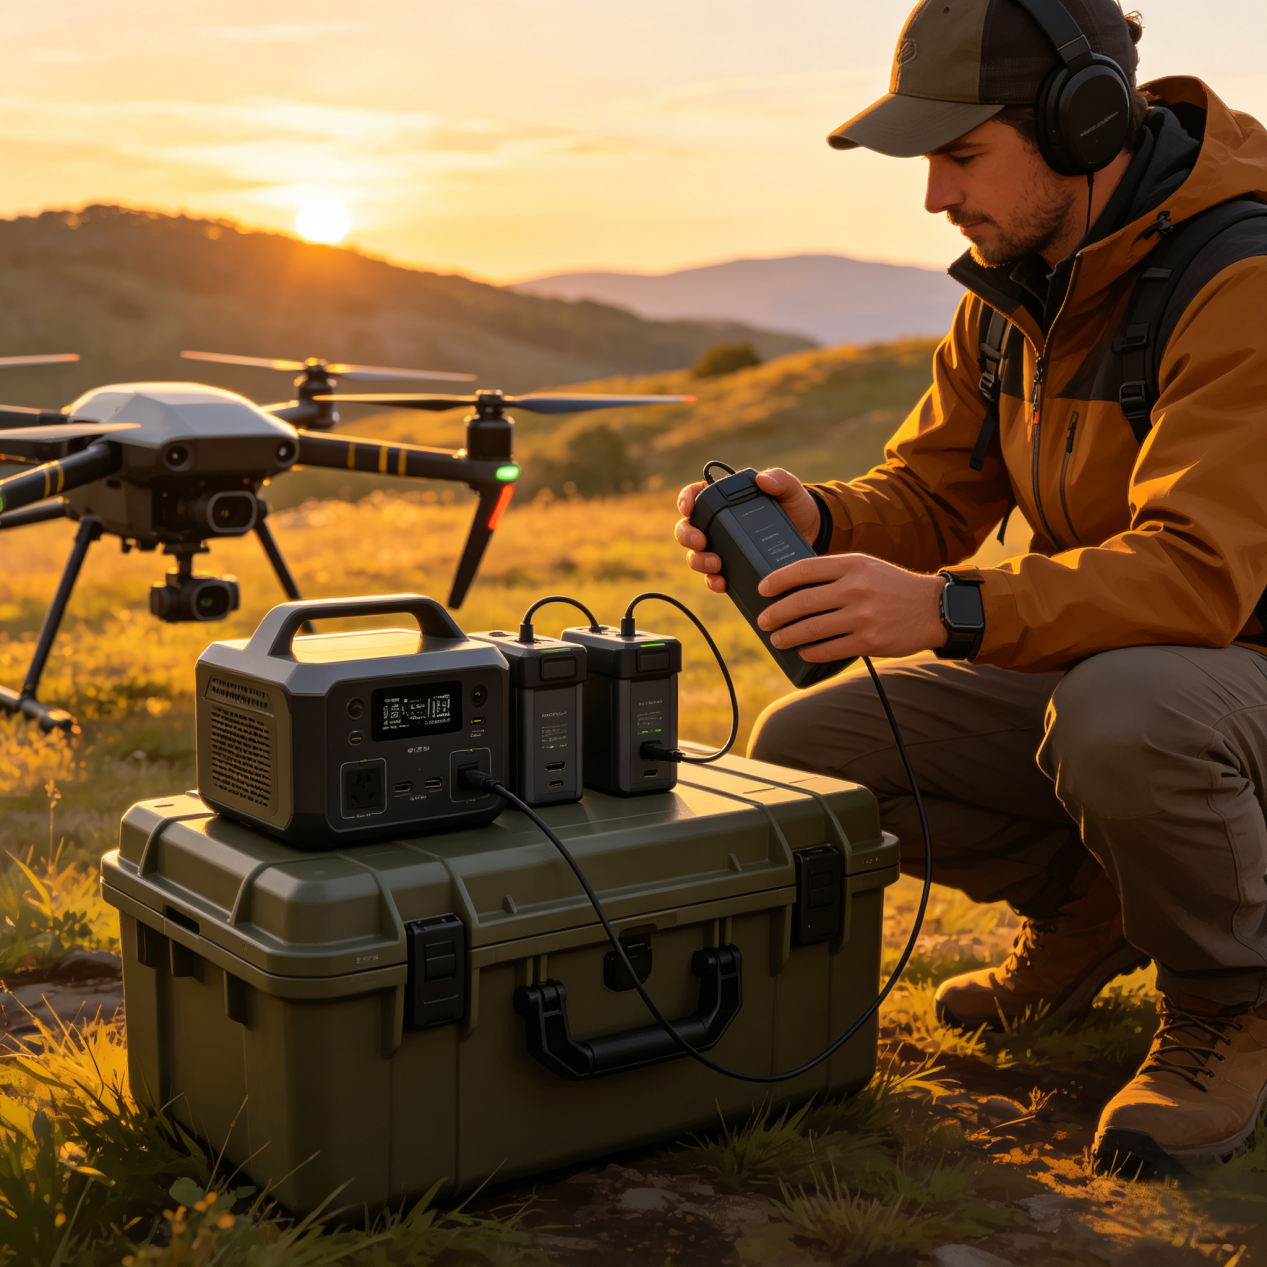
Successfully charging your drone in the field requires three specific components working together harmoniously. Missing or mismatching any of these elements can result in charging failures, equipment damage, or safety risks.
The Essential Trio:
High-output power bank (minimum 45W PD, ideally 65W+)
Your drone's original charger or charging hub
Proper charging cable (USB-C to USB-C or USB-C PD to DC adapter)
This combination ensures that power flows correctly from your power bank, through your drone's charging system, and into your battery with the right voltage, current, and safety protocols. Attempting to bypass the original charger or using inadequate cables is a recipe for disaster.
Your Field Charging Kit
High-Output Power Bank
Not all power banks are created equal, and choosing the wrong one can leave you stranded with a drone that won't charge. Here's what to look for:
Power Protocol (PD or QC): Your power bank must support Power Delivery (PD) or Quick Charge (QC) protocols. These aren't just marketing terms—they're communication standards that allow your power bank to negotiate the correct voltage and current with your drone's charger. Standard USB-A power banks typically output only 5V at 2.4A (12W), which is insufficient for most drone batteries that require 18W to 65W or more.
Capacity ≥20,000mAh (74Wh): Capacity determines how many times you can charge your drone battery. A 20,000mAh power bank at 3.7V equals approximately 74Wh of energy. This is generally the minimum for getting at least one full charge into most drone batteries, with some capacity left over. For extended field operations, consider 30,000mAh (111Wh) or larger power banks, but be aware that airline regulations typically limit carry-on power banks to 100Wh without special approval.
Additional Features to Consider:
Multiple USB-C ports for charging multiple devices
Digital display showing remaining capacity
Pass-through charging capability
Built-in safety features (overcurrent, overvoltage, short-circuit protection)
Durable, weather-resistant construction
Recommended Specifications:
Output: 45W minimum, 65W+ ideal
USB-C PD support: 5V/3A, 9V/3A, 12V/3A, 15V/3A, 20V/3.25A
Capacity: 20,000-30,000mAh
Brand reputation: Anker, RAVPower, Zendure, or similar established manufacturers
Drone Charging Hub/Charger
Your drone's original charger is far more than a simple power converter—it's a sophisticated power management system designed specifically for your battery chemistry and configuration.
Acts as Power Translator: The charger takes the variable voltage from your power bank (typically 5-20V via USB-C PD) and converts it to the precise voltage and current your battery requires. For example, a DJI Mini 4 Pro battery needs approximately 17.6V for charging, while a Mavic 3 battery requires around 22.8V. Your charger handles this conversion safely and efficiently.
Input Options:
USB-C Input: Modern charging hubs (DJI Mini 4 Pro, Air 3, Avata 2) accept USB-C PD directly, making them ideal for power bank charging.
DC Barrel Input: Older or larger drone chargers use traditional DC barrel connectors, requiring a USB-C PD to DC adapter for power bank use.
Why You Can't Skip the Charger: Drone batteries contain sophisticated battery management systems (BMS) that communicate with the charger to monitor temperature, voltage, current, and cell balance. Bypassing the charger eliminates these safety features, potentially leading to overcharging, thermal runaway, or permanent battery damage.
The Correct Cable
The cable connecting your power bank to your charger is often the weakest link in field charging setups. Using the wrong cable can result in power loss, overheating, or complete charging failure.
USB-C to USB-C for Modern Hubs: If both your power bank and drone charging hub use USB-C, you'll need a high-quality USB-C to USB-C cable rated for the appropriate power level. Not all USB-C cables are equal—some are rated for only 60W (3A), while others support 100W (5A) or more. For most drone charging applications, a 60W-rated cable is sufficient, but 100W cables provide better headroom and future-proofing.
USB-C PD to DC Adapter for Older Hubs: If your drone charger uses a traditional DC barrel connector, you'll need a USB-C PD to DC adapter. These adapters convert USB-C PD signals to specific DC voltages (commonly 12V, 15V, 18V, or 20V). Ensure the adapter's output matches your charger's input requirements exactly.
Cable Quality Matters: Cheap cables often have inadequate wire gauge, poor connectors, or missing safety features. Look for cables with:
Proper gauge wiring (18-20 AWG for power delivery)
Reinforced connectors
E-marker chips for high-power negotiation
Reputable brand certification
What is the Step-by-Step Process for Connecting Everything?
Understanding the proper sequence and technique for connecting your field charging equipment is crucial for safety and efficiency. Following the correct process minimizes connection issues, prevents damage, and ensures optimal charging performance.
General Steps: Connect → Insert Battery → Activate Power Bank
The fundamental sequence applies to all field charging setups:
Connect power bank to charger first: Establish the connection between your power bank and charging hub before inserting the battery.
Insert battery into charger: Once the charger is receiving power, insert your drone battery.
Activate power bank: Some power banks require a button press to begin output.
Monitor charging indicators: Watch for proper charging lights or display readings.
Wait for completion: Allow the charging cycle to complete before disconnecting.
Process for Modern USB-C Chargers
Modern drones like the DJI Mini 4 Pro, Air 3, and Avata 2 feature charging hubs with USB-C inputs, simplifying the field charging process.
Confirm Wattage: Before connecting, verify that your power bank can deliver sufficient wattage for your drone's charging hub. Most modern drone chargers require 18W minimum, with 45W+ providing optimal charging speeds. Check your drone's manual for specific requirements.
Proper USB-C Connection:
Use a high-quality USB-C to USB-C cable
Connect one end to your power bank's USB-C PD port
Connect the other end to your charging hub's USB-C input
Ensure connections are secure and fully seated
Battery Placement and Power-On:
Insert the battery into the charging hub, aligning contacts properly
Listen for the click indicating proper connection
Press the power bank's activation button if required
Check charging hub LEDs for proper charging indication
Monitor temperature during charging—hubs should remain cool to warm, not hot
Troubleshooting Tips:
If charging doesn't start, try disconnecting and reconnecting the USB-C cable
Some power banks require a wake-up tap to begin output
Ensure the battery isn't already fully charged
Check for debris in connectors
Process for Traditional DC Chargers
Older or larger drone chargers often use DC barrel connectors, requiring an additional adapter for power bank use.
Use PD to DC Adapter:
Connect the USB-C PD to DC adapter to your power bank
Ensure the adapter's output voltage matches your charger's input requirements
Common voltages: 12V, 15V, 18V, or 20V
Match Plug and Voltage:
Verify the DC adapter's plug size matches your charger's input
Common sizes: 5.5mm x 2.5mm, 4.0mm x 1.7mm
Confirm polarity (center positive is standard)
Double-check voltage compatibility before connecting
Follow Similar Steps:
Connect power bank → adapter → charger
Verify charger receives power (LED indicator)
Insert battery into charger
Monitor charging progress
Disconnect when complete
Additional Considerations: DC adapters introduce an extra connection point, increasing potential failure points. Ensure all connections are secure and protected from moisture or debris. Use adapters with built-in safety features like overvoltage protection.
Are There Any Critical Safety Precautions or Calculations to Know?
Field charging involves more than just connecting devices—it requires understanding power calculations, safety protocols, and realistic expectations about charging performance.
Formula: (Power Bank Wh × 0.8) / Battery Wh ≈ Number of Charges
This formula provides a realistic estimate of how many times you can charge your drone battery with a given power bank.
Breaking Down the Formula:
Power Bank Wh: Total energy capacity of your power bank (Wh = mAh × V / 1000)
0.8 Factor: Accounts for conversion losses (typically 15-25% energy loss during voltage conversion and cable resistance)
Battery Wh: Your drone battery's total energy capacity
Result: Approximate number of full charges possible
Example Calculation:
Power Bank: 74Wh (20,000mAh at 3.7V)
Drone Battery: 44Wh (typical for DJI Mini 4 Pro)
Calculation: (74 × 0.8) / 44 = 59.2 / 44 ≈ 1.34 full charges
This means a 74Wh power bank can provide approximately 1.3 full charges into a 44Wh drone battery, accounting for real-world inefficiencies.
Emphasizes Using Certified Gear and Monitoring Temperature
Certified Gear: Always use chargers, cables, and power banks with recognized safety certifications (UL, CE, FCC, RoHS). Certified equipment includes built-in safety features like:
Overcurrent protection
Overvoltage protection
Short-circuit protection
Temperature monitoring
Proper cell balancing
Temperature Monitoring: Lithium batteries generate heat during charging. Monitor your equipment's temperature throughout the charging process:
Normal: Warm to touch (ambient +10-15°C)
Concerning: Hot to touch (ambient +20-30°C)
Dangerous: Excessively hot, smoking, or melting (immediately disconnect)
Critical Safety & Planning Tips
Ventilated Area, Avoid Overheating:
Charge in open, well-ventilated spaces
Avoid direct sunlight or enclosed spaces
Keep charging equipment away from flammable materials
Use charging bags or containers for LiPo batteries
Never charge inside vehicles or tents
Avoid Cheap or Under-Rated Cables:
Purchase cables from reputable manufacturers
Verify power ratings match your equipment's requirements
Inspect cables regularly for damage or wear
Replace cables showing signs of deterioration
Match Power Outputs:
Ensure power bank output matches charger input requirements
Don't exceed maximum input ratings for any component
Use adapters specifically designed for your application
Verify polarity and connector compatibility
Example Calculation
Let's work through a realistic scenario:
Equipment:
Power Bank: 74Wh (20,000mAh, 3.7V)
Drone Battery: 44Wh (DJI Mini 4 Pro)
Charger Efficiency: Approximately 85%
Calculation:
Available Energy: 74Wh × 0.85 = 62.9Wh
Number of Charges: 62.9Wh / 44Wh = 1.43 charges
Practical Application: This means you can expect approximately 1.4 full charges from your power bank. Plan accordingly for field operations, knowing you'll need to recharge the power bank after depleting it.
Time Management
Power Banks Charge Slower Than Outlets: Field charging takes significantly longer than wall charging due to several factors:
Charging Speed Factors:
Power Bank Output: Limited by maximum wattage (typically 45-65W vs. wall outlet's unlimited capacity)
Voltage Conversion: Additional conversion steps introduce inefficiencies
Cable Quality: Resistance in cables reduces charging speed
Temperature Management: Chargers may throttle speed to prevent overheating
Expected Charging Times:
Wall Outlet: DJI Mini 4 Pro battery (44Wh) charges in approximately 64 minutes with original charger
Power Bank: Same battery may take 80-100 minutes due to power limitations and conversion losses
Planning Implications: Factor in extended charging times when planning field operations. A battery that charges in just over an hour at home may take nearly twice as long in the field. This affects mission planning, especially for time-sensitive operations.
Efficiency Tips:
Start with warm (not cold) batteries for faster charging
Use high-quality, short cables to minimize resistance
Charge in moderate temperatures (15-25°C)
Pre-charge power banks before field operations
Consider bringing multiple power banks for extended operations
Conclusion
Field charging your drone with a power bank is entirely feasible and increasingly common among professional pilots and enthusiasts. However, success depends on understanding and properly implementing the complete charging system: power bank, proper cable, and original charger.
The key takeaways for safe and effective field charging are:
Essential Equipment: Invest in a high-output power bank (45W+ PD, 20,000mAh+), use your drone's original charger as the power management intermediary, and connect everything with high-quality, properly rated cables.
Proper Process: Follow the correct connection sequence—power bank to charger first, then insert battery, then activate power bank. This prevents connection issues and potential damage.
Safety First: Use certified equipment, monitor temperatures, charge in ventilated areas, and never bypass safety features. The small additional cost of quality equipment is insignificant compared to the potential costs of battery damage or safety incidents.
Realistic Expectations: Understand that field charging takes longer than wall charging and provides limited charging cycles based on your power bank's capacity. Plan accordingly using the Wh calculation formula to ensure you have adequate power for your operations.
By following these guidelines, you can confidently extend your drone's operational range, capture more footage, and complete more missions—all while maintaining the safety and longevity of your equipment. Field charging isn't just convenient; it's a professional capability that opens new possibilities for aerial operations when properly understood and implemented.
This guide covers safe drone field charging with power banks, listing required PD gear, correct connection steps, power calculation formulas and key thermal safety rules to protect batteries outdoors.
Table of Contents
- The Essential Trio:
- Your Field Charging Kit
- Additional Features to Consider:
- Drone Charging Hub/Charger
- Input Options:
- The Correct Cable
- Reinforced connectors
- What is the Step-by-Step Process for Connecting Everything?
- Process for Modern USB-C Chargers
- Process for Traditional DC Chargers
- Use PD to DC Adapter:
- Breaking Down the Formula:
- Proper cell balancing
- Critical Safety & Planning Tips
- Time Management
- Conclusion