
 EN
Most pilots never think about how a drone battery is made until the pack they need does not exist. The cell count is wrong, the shape will not fit the frame, the connector is not the one on your power distribution board, or the price is hard to justify in volume. At that point building a pack starts to look like a reasonable idea, and it is, as long as you treat it as careful assembly work rather than a chemistry experiment.
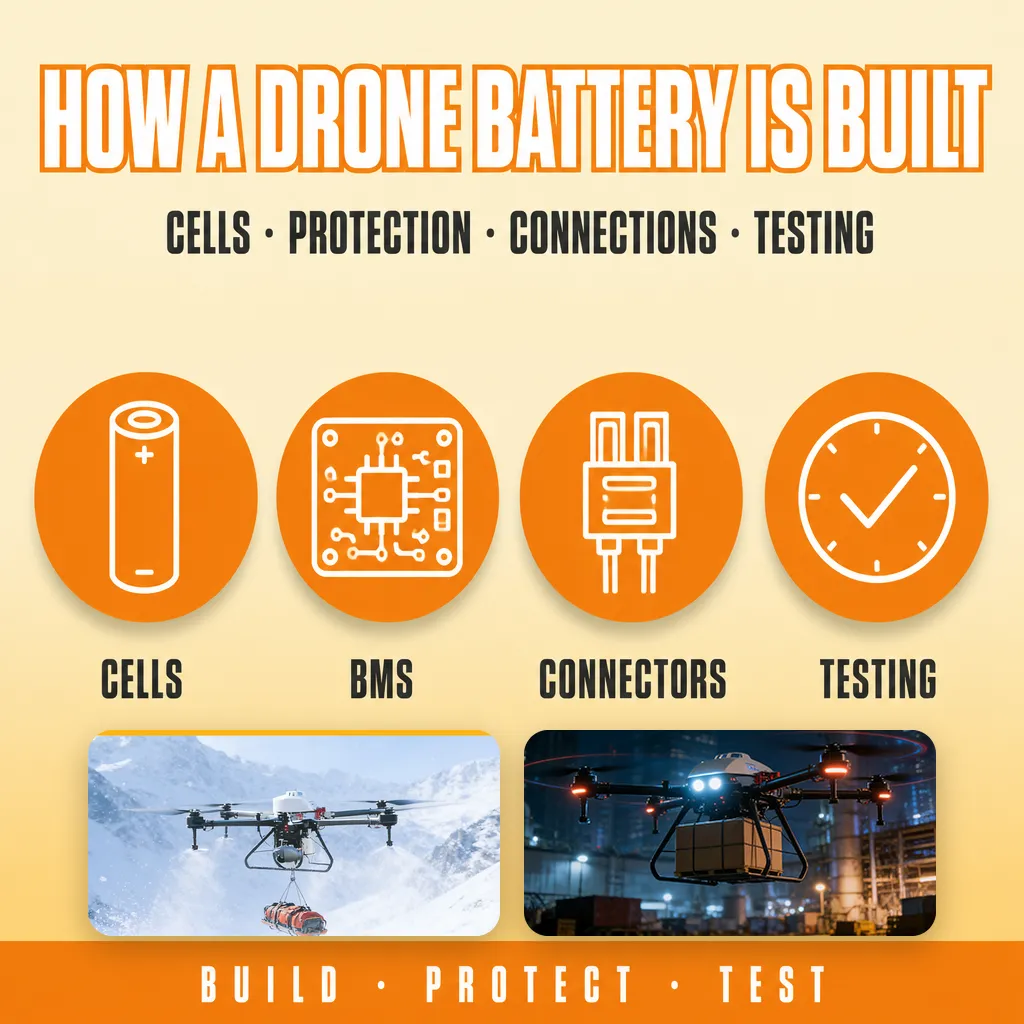
Making a drone battery comes down to four decisions: which cells, how they are arranged, how they are joined, and how the pack is protected. Everything else is execution. What follows is that sequence in the order you would actually work through it, plus the testing and documentation steps that decide whether the pack survives a season.
1. Know the Three Parts of a Drone Battery
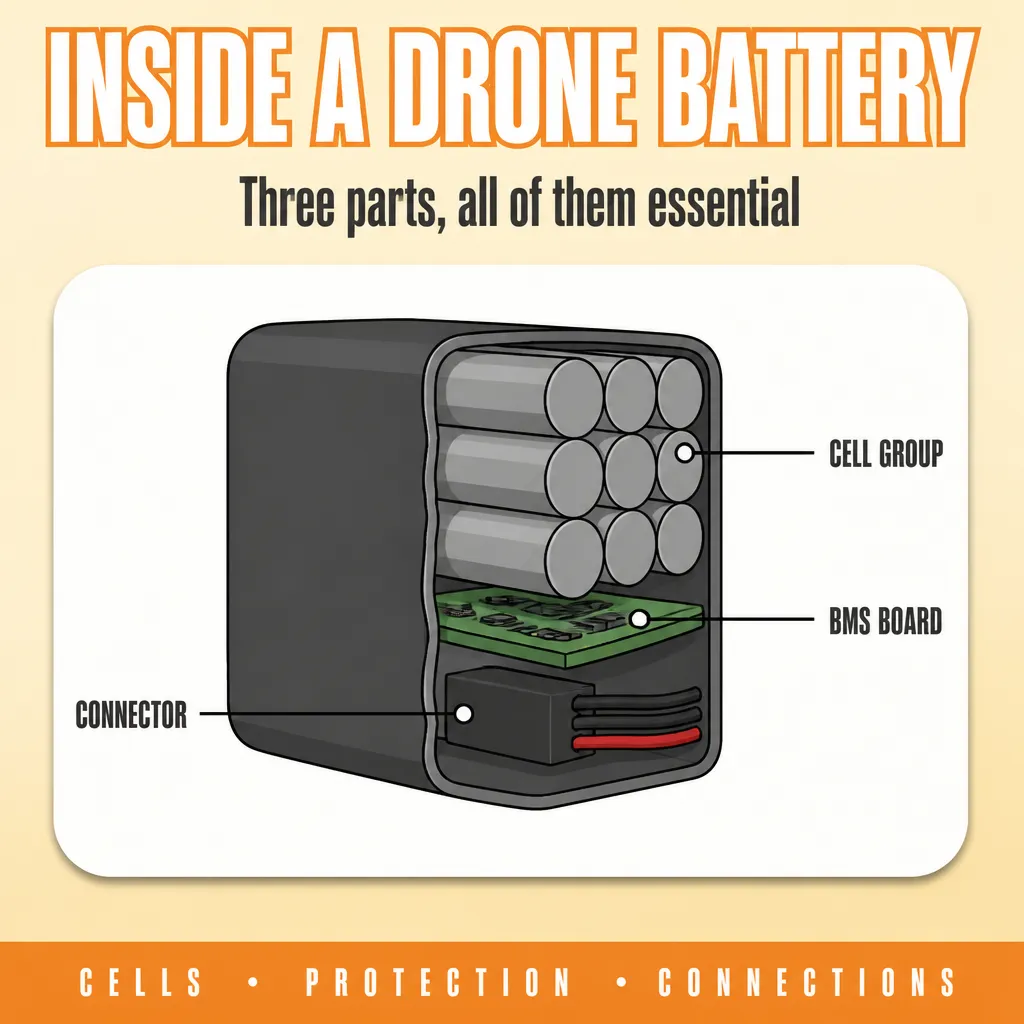
A drone battery is simpler than it looks. There are three parts, and all three matter.
- Cells, which hold the energy. Voltage, capacity, and discharge rating all come from them
- A management or protection board, which keeps the cells inside safe limits and, on smart packs, reports status to the flight controller
- The mechanical side: the connections, wiring, connector, and the wrap that holds everything together and keeps it from shaking apart in the air
Leave out any one of the three and the pack fails, usually in the air. Beginners tend to over-plan cells and under-plan the other two.
2. Choose the Cell Type Before Anything Else
Two families dominate drone batteries, and they are good at different things.
- Pouch cells (LiPo and LiHV) are the familiar soft packs. High discharge rates, light for their power, and available in almost any size, which is why they still dominate FPV and camera drones. They need physical protection, and they do not like being stored at full charge
- Cylindrical Li-ion cells (18650, 21700 and similar) offer more energy per kilogram, lower discharge rates, and far better cycle life. Long-endurance platforms and mapping drones usually run these
A discharge rating that looks impressive on a label is worthless if the cells cannot feed your peak current without sagging. Match the continuous discharge rating to what your motors actually pull, then add margin.
3. Work Out Voltage and Capacity First
This is the part worth writing down before you buy anything.
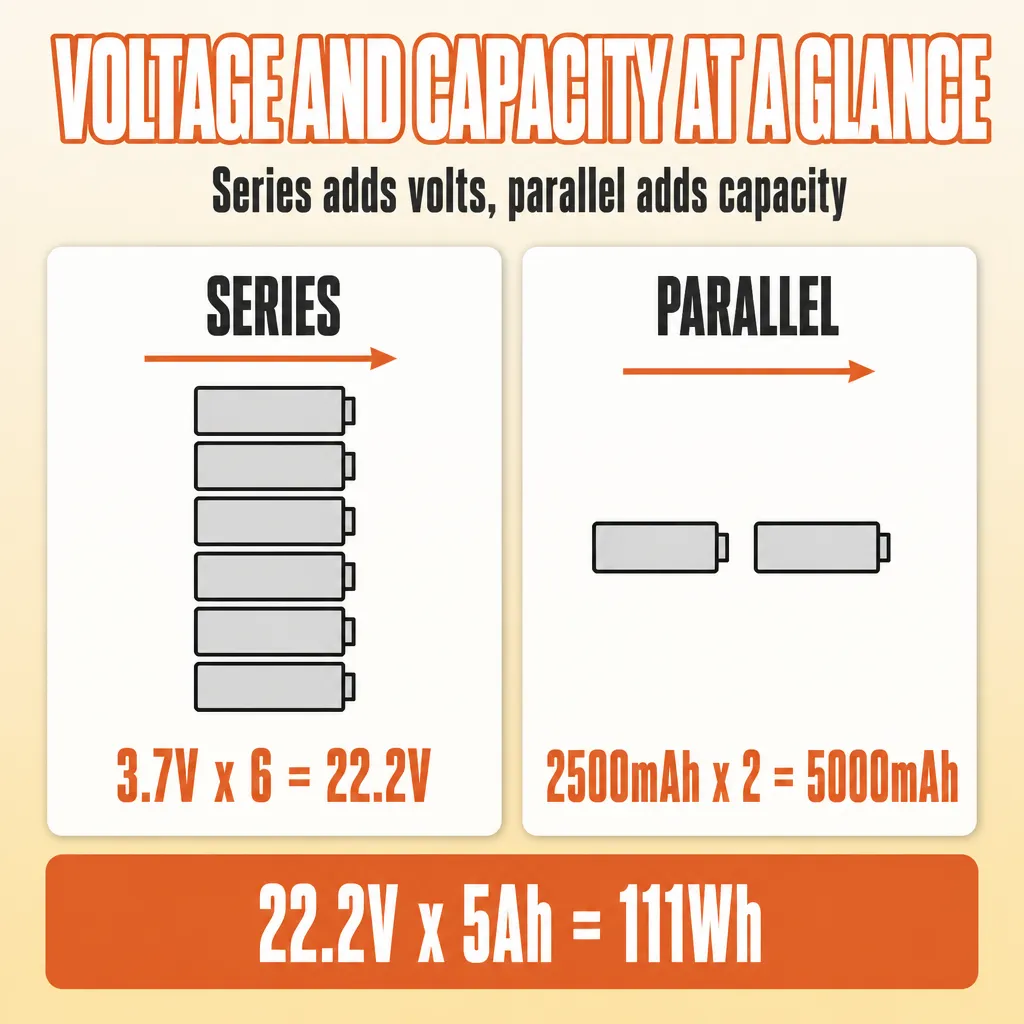
- Cells in series add voltage. A single LiPo cell is nominally 3.7V and charges to 4.2V, so a 6S pack is 22.2V nominal and 25.2V fully charged
- Cells in parallel add capacity and current capability. Two parallel groups of 2500mAh cells give 5000mAh
- Watt-hours tell you the real energy: voltage multiplied by amp-hours. A 6S 5000mAh pack holds roughly 111Wh (22.2V × 5Ah)
Then check the weight. Every pack is a trade between flight time and how the aircraft handles, and a pack heavier than the airframe was designed for costs more flight time than the extra capacity buys.
4. Match the Cells Before You Join Them
Cells that leave a factory together are close, but not identical. Use new cells of the same model from the same batch. Do not mix models, and never mix new cells with cells that have already flown.
Before assembly, measure every cell for two things:
- Capacity, so you can group the closest ones together
- Internal resistance, which matters more than capacity for how a pack behaves under load
Sort the cells and build each pack from the tightest group you have. A pack is only as strong as its weakest cell, and one high-resistance cell will pull the whole pack out of balance.
5. Join the Cells With a Spot Welder
Heat kills lithium cells. Soldering directly onto a cell terminal pushes heat into the seal and the internal structure, and the damage often does not show up until the pack is already in service. Spot welding with nickel strip does the same job in milliseconds with far less heat, which is why commercial packs are built that way.
Four things decide whether the joints hold up:
- Size the nickel strip for peak current rather than average, because undersized strip adds resistance, heat, and voltage sag
- Keep the weld pattern even so current spreads across the connection
- Use the right wire gauge for the main leads and keep them as short as the airframe allows
- Support the leads where they leave the pack. Vibration, not current, is what breaks solder joints
6. Add Protection and Balancing
A bare group of cells will happily destroy itself, so protection belongs on every pack you build, whether that is a full battery management system or a balance board with a separate protection circuit. At a minimum you want:
- Over-charge and over-discharge cut-off set for your chemistry
- Over-current and short-circuit protection rated above your peak draw, so it does not trip in flight
- Cell balancing, so the pack stays level over hundreds of cycles
- Temperature sensing on packs that will work hard or fly in the heat
Smart packs go further and report cell voltages, cycle count, and health to the flight controller, which is what lets the aircraft warn you before a cell gives up. That data, and the testing behind it, is most of the reason a commercial pack costs more than the cells inside it.
7. Build It to Survive the Airframe
This is where homemade packs fail in practice: not electrically, but mechanically.
- Hold the cells with spacers or holders so they cannot rub against each other
- Insulate between the pack and anything conductive on the frame
- Wrap the pack with tape and heat-shrink so nothing shifts under vibration
- Use a connector rated for your current, and make sure it matches what is already on the aircraft
- Protect the pack from moisture if the drone flies outdoors, and keep the wrap intact around the balance leads
Weight and balance deserve the last look. A pack that shifts the center of gravity changes how the drone flies, and the flight controller can only do so much about that.
8. Test Every Pack Before You Fly It
A new pack earns its trust in the workshop, not in the air.
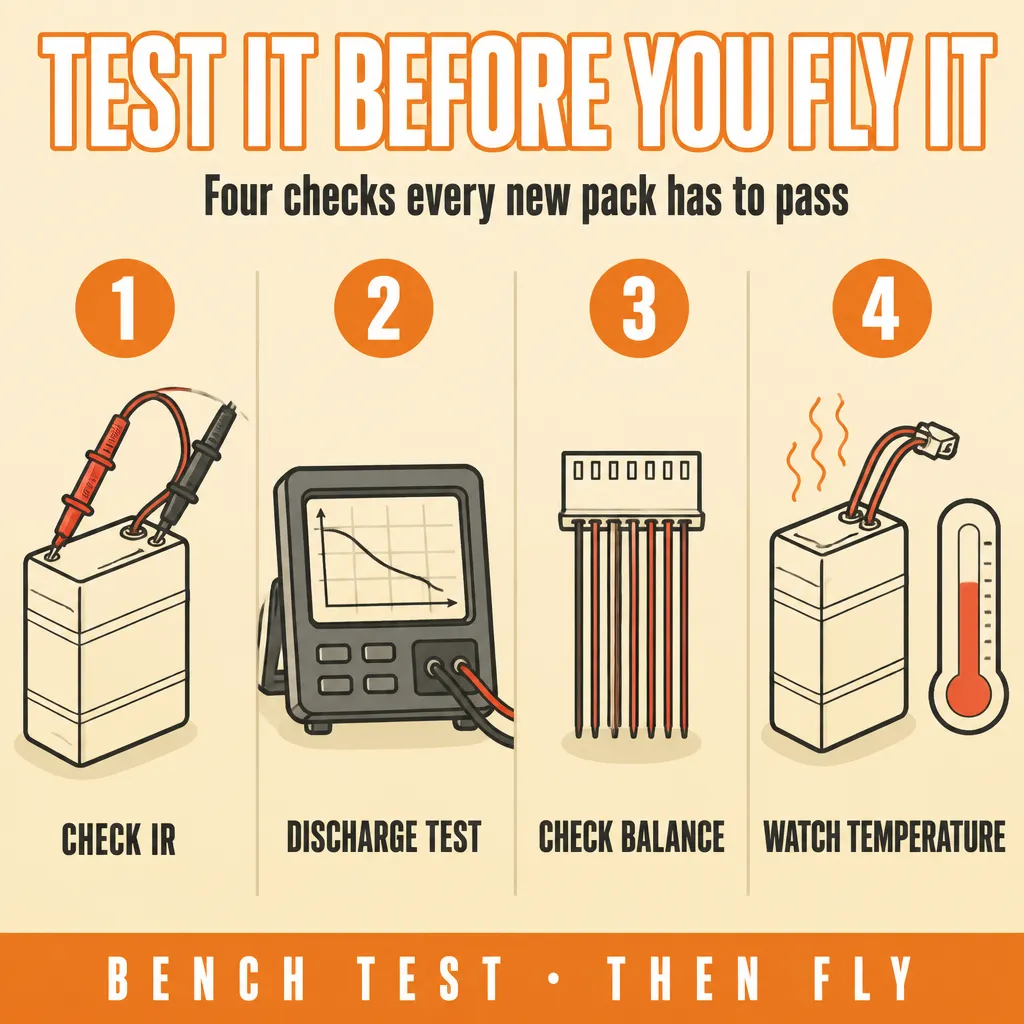
- Check internal resistance cell by cell after assembly. Outliers mean a bad weld or a bad cell
- Run a full discharge test and compare delivered capacity with the rated figure
- Confirm the pack balances and that the protection board cuts off where it should
- Watch temperature under load through the first cycles
- Keep those first cycles gentle, and charge in a safe, non-flammable area
If one cell deviates from the rest, stop and fix it. An unbalanced pack does not improve with use.
9. Know What You Can Ship or Sell
Building a pack for yourself and selling one are two very different projects. Anything lithium that moves through commerce or transport is treated as dangerous goods, and a pack assembled at home has no test history behind it. For a pack that leaves your bench as a product, the baseline is:
- UN 38.3 test results. Every lithium cell and battery type in transport has to pass these tests, and a test summary has to be available for the pack being shipped
- IEC 62133-2:2017, the safety standard covering portable sealed lithium cells and batteries, including the assembly of cells into packs
- Correct Class 9 marking and labelling for transport
- The EU Batteries Regulation (EU) 2023/1542, in force since February 2024, with labelling duties phasing in from 2026 and the digital information requirements that follow
That paperwork is also the practical argument for buying rather than building. A reputable supplier hands you the documentation with the pack, and the pack behind it has already been through the testing.
Mistakes That Ruin a Homemade Pack
- Soldering directly onto cell terminals and cooking the seals
- Mixing cells of different models, batches, or ages in one pack
- Building a pack with no balancing or protection at all
- Sizing strip and wire for average current instead of peak current
- Skipping insulation between the pack and the conductive frame
- Flying a new pack hard before it has proven itself on the bench
- Charging a suspect or swollen pack indoors to see what happens
- Shipping or selling a pack with no test documentation behind it

Final Thoughts
Making a drone battery is a sequence rather than a single skill: pick the chemistry that suits your mission, do the series and parallel math, match the cells, weld instead of solder, protect the pack, and test it before it ever leaves the bench. Pilots who work through those steps end up with packs built for their aircraft instead of packs that almost fit it.
If the goal is a reliable fleet rather than one experiment, the calculation changes. A pack that arrives tested, documented, and reproducible is worth paying for, particularly when the alternative is a pack you cannot ship and would not want to fly over anything valuable.
Related Articles
How to Choose Drone Batteries
Learn how voltage, capacity, discharge rating, and cell quality decide which pack belongs on your drone.
How to Check the Health of Drone Batteries
Spot wear early by checking physical condition, voltage, capacity, internal resistance, and battery warnings.
How to Charge Drone Batteries on the Go
Plan around charge time, match the charge rate to your pack, and keep field charging safe.
Table of Contents
- 1. Know the Three Parts of a Drone Battery
- 2. Choose the Cell Type Before Anything Else
- 3. Work Out Voltage and Capacity First
- 4. Match the Cells Before You Join Them
- 5. Join the Cells With a Spot Welder
- 6. Add Protection and Balancing
- 7. Build It to Survive the Airframe
- 8. Test Every Pack Before You Fly It
- 9. Know What You Can Ship or Sell
- Mistakes That Ruin a Homemade Pack
- Final Thoughts
- Related Articles